Traditional Nail Filing: Sharpen Your Skills!
Mastering your filing technique is key to creating stunning acrylic nails that your clients will love! Whether you’re a fan of traditional hand files or the speed of an e-file, this guide from DeEnterprises will help you achieve sharp, clean shapes every time. Let’s dive in!
Client & Hand Positioning: The Foundation of Filing
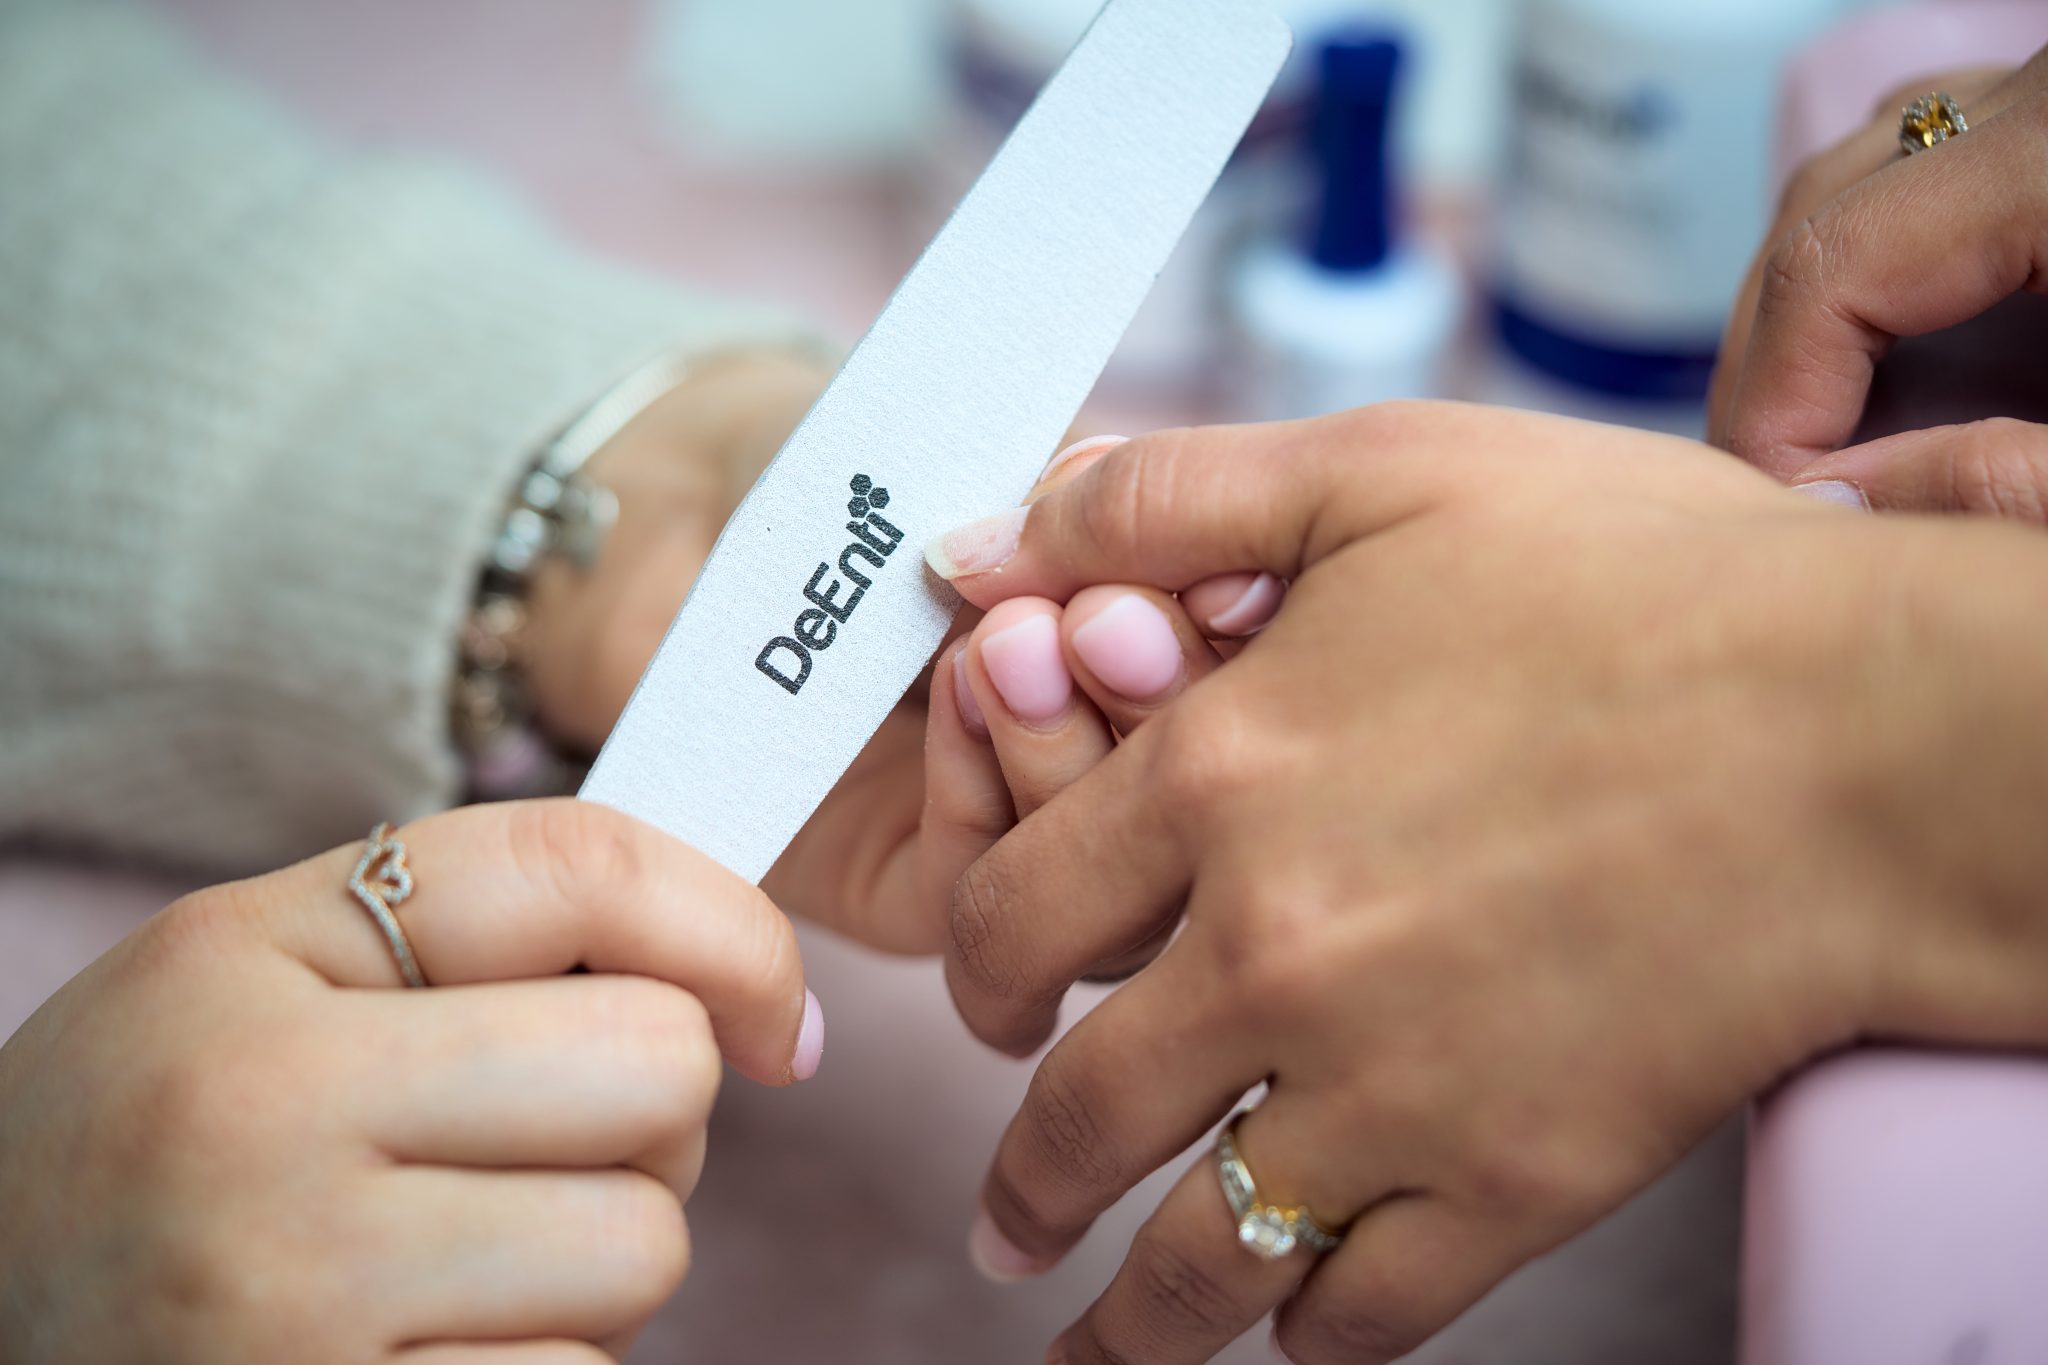
Getting those crisp lines and perfect curves with a traditional file is all about technique.
First things first, proper positioning is crucial. Have your client rest their hand on a comfortable surface. Their fingers should be relaxed, not stiff. For you, it’s about stability. Use your non-filing hand to support the client’s finger firmly, but gently. This prevents movement and gives you a steady base to work from. Think of it like a sculptor holding their clay – a stable base leads to precise work!
Are You Filing Natural Nail or Cured Enhancement?
✨ Filing Natural Nails ✨
Natural nails are delicate and prone to splitting, peeling, and damage if not filed correctly.
– Gentle Grit
Always use a finer grit file (240 grit or higher, like a glass file or fine emery board). Coarse files can be too harsh and tear the natural nail layers.
– One Direction is Key
For natural nails, it’s generally recommended to file in one direction only. Start from the side and sweep towards the center of the nail, lifting the file before starting the next stroke from the opposite side. This “one-directional” filing helps to seal the nail’s edge, preventing frayed edges and minimizing the risk of splits and peeling.
– Avoid “Sawing”
Filing back and forth in a “sawing” motion can create micro-tears in the delicate nail layers, leading to weakness, peeling, and breakage over time. While some debate exists for very strong natural nails with fine grit files, the safest and most widely recommended practice is one-directional filing.
– Light Pressure
Use very light pressure to avoid thinning or damaging the natural nail plate.
✨ Filing Artificial Enhancements (Cured Acrylic) ✨
Cured acrylic is a much harder, more durable material than the natural nail, so it requires different tools and techniques for efficient and safe shaping.
– Coarser Grit is Your Friend
You’ll typically use coarser grit files (e.g., 80-180 grit for hand files, or specific e-file bits like carbide) for bulk reduction and initial shaping of acrylic. These grits are necessary to efficiently remove the hard product.
– More Flexibility in Motion
While one-directional filing is still good for precision, you can often use a slightly more dynamic filing motion on acrylic. For example, with an e-file, you might make short, controlled strokes back and forth across the surface to quickly reduce bulk, as long as you’re keeping the bit parallel and moving it constantly to prevent heat buildup. The key is control and consistent movement, avoiding any overly-aggressive sawing motions.
– Focus on Structure
When filing acrylic, you’re not just shaping the tip; you’re refining the entire structure, including the apex and C-curve, to ensure strength and balance.
– Check for Heat
Because of the friction involved, especially with e-files, it’s crucial to constantly check for heat buildup on the client’s nail. If it feels hot, lift the file or reduce RPMs immediately.
– Heavy-Duty Tools
E-files with specific bits (like carbide or ceramic barrels) are invaluable for quick and efficient shaping and bulk reduction of acrylic, something a fine natural nail file simply couldn’t achieve.
Think of it this way: Natural nails need a gentle, one-directional caress with a fine tool to prevent damage, while artificial enhancements can handle more aggressive grits and techniques to sculpt their harder material.
Shaping Steps: From Sidewalls to C-Curve
Here’s a routine to get those shapes dialed in:
1. Sidewalls First!
Always start by perfecting the sidewalls. These are the straight lines running from the nail’s stress points to the free edge. File them perfectly straight and parallel to the finger.
2. The Free Edge
Once your sidewalls are on point, move to the free edge (the tip of the nail). File from one sidewall to the other, making sure your file is straight and even. This is where you create the basic shape.
3. Apex & C-Curve Refinement
The apex is the highest point of the nail, providing strength. The C-curve is the natural curve of the nail when viewed from the free edge. While you mostly build these with your acrylic application, a gentle touch with your file can refine them. For the apex, imagine a smooth arch. For the C-curve, ensure a consistent, elegant curve across the nail.
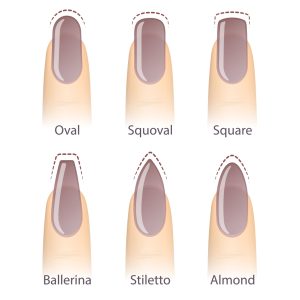
Filing Angles for Different Shapes
The angle at which you hold your file dictates the final shape.
-
- Square: Keep your file straight and perpendicular to the free edge (90-degree angle). For sharp corners, file the sidewalls perfectly straight.
- Coffin/Ballerina: Start like a square, then gently angle your file inward from the stress points towards the free edge to create the tapered sides. The tip remains straight.
- Almond/Oval: File the sidewalls at an even angle from the stress points to a rounded point at the free edge. Imagine a soft, symmetrical curve.
- Stiletto: This is a more dramatic and generally longer version of almond. File at a steeper angle from the stress points to a sharp, pointed tip. Be precise!
✨ Consistent Pressure & Directional Filing: Your Golden Rules ✨
Always use consistent, light-to-medium pressure. Too much pressure can create grooves or remove too much product.
And here’s a big one: always file in one direction! Filing back and forth (sawing) creates friction, can lift the product, and makes it harder to get a clean line. Think of it as sculpting – each stroke is intentional.
Avoiding Common Filing Mistakes
- Over-filing
This is a common one! To avoid it, check your work frequently by looking at the nail from all angles. Less is more – you can always remove more, but you can’t put it back! - Flat Spots
These happen when you apply uneven pressure. Keep your file flat against the desired surface and use smooth, even strokes. - Uneven Sides
Constantly compare both sides of the nail. Symmetry is key! Step back and look at the nail from a distance to catch any inconsistencies.
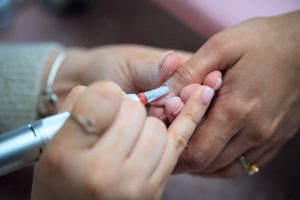
️ E-File Bits: Your Arsenal of Tools ️️️
E-files can be a game-changer, offering incredible speed and precision, but safety and knowing your bits are paramount! E-file bits come in various materials, shapes, and grits, each designed for specific tasks.
 Carbide Bits: These are super durable and excellent for fast bulk reduction and shaping. They have flute-like cuts that quickly remove product. Think of them as your heavy-duty workers.
- Ceramic Bits: Similar to carbide, but they generate less heat, making them great for clients who are sensitive to heat. Also good for bulk reduction and shaping.
- Diamond Bits: These bits are made with small diamond particles bonded to the surface. They’re great for surface work, refining, and cuticle work because they’re gentler and don’t create “heat rings.”
- Sanding Bands: These are single-use paper bits that fit over a mandrel. They’re excellent for prep work, refining the surface, and smoothing before top coat. They come in various grits, from coarse to fine.
Bits for Shaping Acrylic: Bulk Reduction & Refining
For acrylic shaping and bulk reduction, you want bits that can efficiently remove product without causing excessive heat or damage.
 Barrel Bits: These are cylinder-shaped and come in various grits. They’re fantastic for surface reduction, shaping the top of the nail, and taking down bulk quickly. Use them for general shaping of the nail surface.
- Tapered Barrel Bits: Similar to barrels but with a slight taper. Great for shaping and refining the side walls and free edge, offering more precision than a straight barrel.
- Large Cone Bits: These bits are coned-shaped and can be used for under-nail cleaning and shaping the C-curve from underneath. They’re also good for larger surface areas.
Simple Pro Tip:
For initial bulk reduction and shaping, opt for medium to coarse grit carbide or ceramic bits.
For refining and smoothing, move to finer grits.
️️ ️ Bits for Cuticle Work: Safety First! ️️️
When it comes to the delicate cuticle area, safety and precision are your top priorities.
You want bits that are gentle and allow for meticulous work without damaging the natural nail or skin.

Flame Bits: These are small, pointed bits shaped like a flame. They’re excellent for lifting and cleaning the cuticle area and can get into tight spots.
Ball Bits: Tiny, rounded bits that are perfect for gently pushing back and cleaning the eponychium (living skin around the cuticle). They are very safe as they have no sharp edges.
Tiny Cone Bits: These small, pointed bits are also good for cleaning around the cuticle and sidewalls, offering more precision for detailed work.
❇️ Material for Cuticle Work – Diamond bits are the safest and most effective for cuticle work because they are less abrasive and generate less heat compared to carbide. Always use a fine grit for this delicate area.
⚡ RPMs: The Right Speed for the Job ⚡
RPMs (rotations per minute) are crucial for efficient and safe e-file use.
| Setting | RPMs | Best Use |
| Low: | 5,000 – 10,000 | Cuticle work and delicate finishing. |
| * Pro Tip – | Slower speeds provide more control and reduce the risk of heat buildup or damage. | |
| Medium: | 10,000 – 15,000 | Refining shapes, blending, and surface work. |
| High: | 15,000 + | Bulk reduction and quickly removing product. |
| * Pro Tip – | Higher RPMs means faster removal, so be extra cautious! |
Always adjust your RPMs based on the bit type, the task at hand, and the client’s comfort. Listen to your e-file – if it’s struggling or vibrating excessively, your RPMs might be too low or too high for the bit you’re using.
✅ E-File Safety Precautions: Protect Yourself & Your Client! ✅
 Keep the Bit Parallel
Always keep your e-file bit parallel to the nail surface as much as possible. Angling the bit can create rings, grooves, or divots.- Avoid Excessive Pressure
Let the e-file do the work! Light, consistent pressure is all you need. Pushing too hard generates heat and can cause damage to the natural nail or client discomfort. - Keep Moving
Never hold the bit in one spot for too long. Keep the bit constantly moving across the nail surface to prevent heat buildup and burning. - Clean Bits Regularly
Dirty bits are inefficient and can cause friction. Clean your bits after each use with a brush and appropriate cleaner. - Practice on Practice Hands
If you’re new to e-files, practice on a practice hand or tips before working on a client. - Dust Control
Wear a mask to avoid inhaling dust, and use a dust collector or fan to keep your workspace clean.
Mastering both traditional and e-filing takes time and practice. Don’t get discouraged! The more you practice, the more confident and skilled you’ll become.
Your clients will notice the difference in your precise shapes and smooth finishes. So, grab your files, turn on your e-file, and start perfecting those nails!
