Nail the Clock: Speed Up Your Acrylic Sets & Fills Without Sacrificing Quality!
Hey there, nail pros! We all know time is money in the salon, and speeding up your acrylic sets and fills can make a huge difference to your bottom line and client satisfaction. But how do you get faster without cutting corners or compromising on that flawless finish your clients love? At DeEnterprises, we hear you! This post is packed with practical tips to help you speed up acrylic sets and fill services while still delivering stunning, durable acrylics. Let’s dive in!
Organize Your Workspace
Alright, this first tip to speed up your acrylic application is so simple but since it doesn’t take any practiced effort to accomplish it is also the best place to start.
- Organize (and maintain) your workspace.
That’s it – and it’s really that simple. A cluttered station is a slow station! Imagine searching for your monomer while a client waits. Keep everything you need within an arm’s reach and in its designated spot. This simple habit saves precious seconds between each movement allowing you to naturally speed up your acrylic sets and fills (which adds up over a day!).
Prep Like a Pro (Because It Matters!) ✨
Think of nail prep as laying the foundation for a skyscraper – if it’s not strong, the whole building wobbles! Efficient prep sets you up for success and prevents issues that can eat up time later. Here’s how to do it smartly:
- Sanitation First: Always start with proper hand sanitization for both you and your client. Quick, but crucial for health and safety!
- Gentle Cuticle Work: Gently push back cuticles and carefully remove any non-living tissue. Over-cutting or being too rough can cause problems.
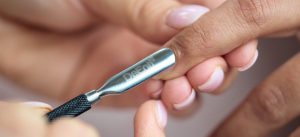
- Light Buffing: Just enough to remove shine and create a good grip for the acrylic. Don’t over-buff and thin the natural nail.
- Bonder & Primer: Apply these precisely. They remove oils and create the perfect surface for adhesion, preventing lifting that takes time to fix.
Choose Your Products Wisely
Your products are your partners in speed and quality. Using high-quality, consistent acrylic liquid and acrylic powder makes a world of difference. Why? Because they’re designed to work with you, not against you!
- Self-Leveling Properties: Good acrylics will gently self-level, reducing the need for excessive filing later. This saves you tons of time.
- Consistent Cure Times: Reliable products set up predictably, so you know exactly how much working time you have. No surprises!
- DeEnterprises Difference: Our acrylic systems are formulated for smooth application and consistent results, allowing you to work more efficiently.
Working fast is sloppy and requires more back-end filing.
Working efficiently provides high quality results, quickly.
We’re all about that quality finish!
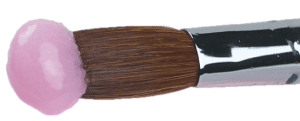
Master the Monomer-to-Polymer Ratio ⚖️
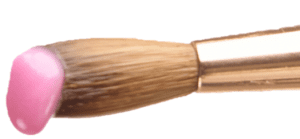
This is probably one of the BIGGEST factors in your application speed and the strength of your nails. Getting your liquid (monomer) and powder (polymer) mix just right is essential. It’s like baking – too much liquid, and it’s soup; too much flour, and it’s crumbly!
| Too Wet (Soupy): If your bead is too wet, it will run into the sidewalls and cuticles, creating flooding and requiring extensive cleanup and filing. This slows you down big time! |
 |
|
 |
Too Dry (Crumbly): A dry bead is hard to work with, won’t self-level, and can create lumpy nails that need a lot of filing. It also makes the product weaker and more prone to breaking. |
|
|
Just Right: |
 |
|
Brush Control & Bead Placement
Precision Pays Off!
Where you place that bead and how you guide it can save you precious minutes on filing. Every swipe counts!
Pick the Right Size Bead: Learn to pick up just the right amount of product for each section of the nail. This comes with experience.
One-Ball or Two-Ball Method: Whether you prefer to apply acrylic in one large bead or two smaller ones, practice placing the product precisely where it needs to go.
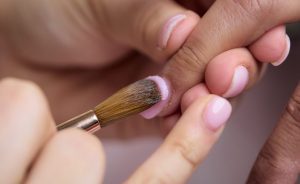
Close, Not Touching: Place your first bead just shy of the cuticle area and gently guide it into place. This prevents flooding and keeps your cuticle line clean, drastically cutting down on filing.
Build the Apex: Understand where the apex (the highest point of the nail) should be for strength and shape, and sculpt it correctly during application.
Filing & Finishing
Work Smarter, Not Harder ⚙️
If you’ve sculpted well during application, your filing time will shrink dramatically. This is where those earlier steps really shine!
Sculpt During Application: Aim to get the shape and structure almost perfect with your brush. The less you have to file, the faster you’ll be.
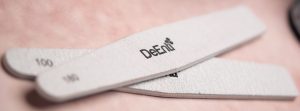
Choose the Right Grit: Start with a medium grit file (e.g., 100/180) for shaping, then move to a finer grit (e.g., 240) for smoothing. Using too coarse of a file can create deep scratches.
Efficient Strokes: Use consistent, controlled strokes. Over-filing or random movements waste time and can alter the nail’s structure.
Practice Makes Perfect (Seriously!)
There’s no magic wand for speed. The more you practice, the more natural and free-flowing these steps become. You’ll develop muscle memory, and your hands will move with greater efficiency and confidence. Set aside time to practice on tips or practice hands, focusing purely on speed and precision.
By implementing these tips, you’ll be amazed at how much faster you can complete beautiful, high-quality acrylic sets and fills. Your clients will love the quicker service, and you’ll love the extra time and increased earnings! Ready to elevate your game?
✨ Explore DeEnterprises’ full range of professional acrylic products today! Our high-quality monomers and polymers are designed to help you achieve consistent, flawless results every time, making your job easier and faster. Shop now!
