- A Guide to the Perfect Cuticle Application
Goodbye Lifting! A Guide to the Perfect Cuticle Application

For any nail technician, the cuticle area is the ultimate signature of quality. A clean, seamless application not only looks stunningly professional but is also the number one defense against premature lifting. We all know the fear: that moment your acrylic bead gets a mind of its own and floods the sidewalls and cuticle, creating a messy look that you just know will cause problems later.
It’s a frustrating experience, but what if we told you it’s completely avoidable? Forget the guesswork and anxiety. We’re here to give you a simple, step-by-step method for achieving a perfect, clean cuticle line every single time.
Part 1: You Can’t Succeed Without Perfect Prep
Before you even think about picking up your acrylic brush, your success is being decided by your prep work. A flawless application on a poorly prepped nail is still a recipe for disaster.
Here are the non-negotiable prep steps:
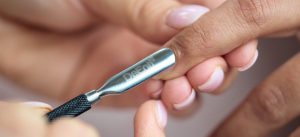 Gentle Cuticle Pushing: First, gently push back the cuticles. Pay close attention to the invisible layer of skin called the eponychium that grows on the nail plate. Every bit of this must be carefully removed, as any skin left behind will cause lifting.
- Pro Tip: Make this process easier and more effective by using a bit of DeEnti Cuticle Remover. It softens the skin, making it simple to push back and clean the nail plate thoroughly.
- Light Buffing: Lightly buff the entire nail plate to remove the natural shine. Be extra attentive to the cuticle area, as this is where oils can hide. This creates a slightly coarse surface that the acrylic can grip onto for superior adhesion.
- Dehydrate and Prime: The final prep step is to remove all oils and dehydrate the nail plate. Wipe the nail with a lint-free wipe soaked in a nail cleanser or, for maximum effect, use DeEnti PH Plus Nail Bonder. Once the nail is chalky-white and dehydrated, apply your DeEnti Magic Bond Primer sparingly, only on the natural nail.
Part 2: The ‘Magic’ is in Your Bead
Now that your canvas is perfectly prepped, it’s time to think about your product. The consistency of your acrylic bead is absolutely critical for a clean cuticle application.
For this specific area, you need a slightly drier bead than what you might use for building the body of the nail. You’re looking for a bead that holds its round shape on your brush without immediately wanting to run or flatten. This control is what gives you the precious seconds you need to place it and guide it perfectly into place.
Think of it this way: an overly wet, runny bead is like trying to paint a straight line with watercolor on a wet page—it will bleed and go everywhere! A drier, more controlled bead is like using a fine-tip marker—it goes exactly where you put it, giving you crisp, clean lines.
Part 3: Step-by-Step Flawless Cuticle Application
Ready for the magic? Follow these simple steps for a perfect application every time.
| 1. |
Pick Up a Small Bead: You don’t need a lot of product here. For the cuticle area, pick up a small bead of acrylic. Don’t overload your brush; control is the name of the game. |
|
|
|---|---|---|---|
| 2. |
Place the Bead: This is the most important step. Place the bead on the nail plate below the cuticle line, not right against it. Leave a tiny gap, about the thickness of a credit card, between the bead and the skin. |
|
|
|
|
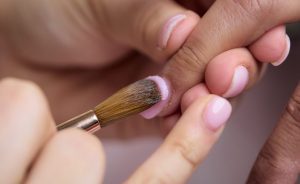
3. | Press and Guide: Let the bead settle on the nail for just a second to stabilize. Then, using the very tip of your brush, gently press the bead and guide it towards the cuticle, stopping just short of touching the eponychium. The product should naturally flow to create a thin, smooth, and perfectly rounded edge. | |
| 4. | Feather and Blend: With the cuticle edge established, use the body of your brush to gently feather the rest of the bead down the nail. Blend it seamlessly into the rest of your nail structure (like your apex) to ensure there are no lumps or lines. | ||
The “Sealing the Deal” Technique
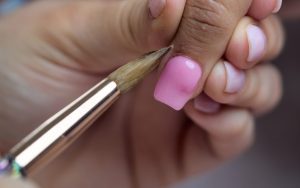
Want to take your application to the next level? Try this sealing technique for the ultimate defense against lifting. After you’ve guided the bead into place, turn your brush on its side. Use the clean, sharp edge of the brush to gently press and tuck the acrylic right along the cuticle line. This simple motion creates a tight, invisible seal that clients will love.
Quick Fixes & Troubleshooting
Q: I flooded the cuticle! What do I do?
A: Act fast! Before the acrylic begins to set, dip a clean, sharp-edged tool or the tip of your brush in monomer and carefully wipe away the excess product from the skin. A clean line is always worth the extra second it takes to fix.
Q: My acrylic looks thick and bulky at the cuticle.
A: This means your bead was too large or you didn’t blend it down the nail enough. Remember, the cuticle area should be the thinnest part of the entire enhancement, tapering out smoothly. Practice using a very small bead just for this zone. The thickest part should be the Apex.
Q: I did everything right, but it still lifted a week later!
A: Go back to Part 1: Prep! Nine times out of ten (if not more), delayed lifting is caused by an invisible layer of cuticle left on the nail plate. Be extra thorough and meticulous with your nail prep—it is the true foundation of a long-lasting set.
* * You’ve Got This! * *
Mastering the cuticle application is a skill, and like any skill, it takes patience and practice. Don’t get discouraged if your first few attempts aren’t perfect. Each set is a new opportunity to refine your technique.
Using high-quality products will make your job infinitely easier. A professional, medium-set monomer and a finely-milled powder from DeEnterprises will give you the buttery consistency and reliable control you need to master this crucial technique.
Ready to create your most flawless sets yet? Explore our range of acrylic systems and find the perfect partner for your craft!
